
Isn’t it frustrating when a leaky faucet disrupts your peace? Before you pick up the phone to call a plumber, you might want to contemplate some straightforward fixes. Knowing the type of faucet you have is just the beginning. From turning off the water supply to inspecting washers, there are practical steps you can take to tackle the issue yourself. Let’s investigate these easy solutions that could save you time and money.
Identify the Type of Faucet
How do you know which type of faucet you’re dealing with? First, take a good look at your faucet.
There are four main types: compression, cartridge, ball, and ceramic disc. If you see two handles and have to twist them to turn the water on, it’s likely a compression faucet. A single handle that moves back and forth? That’s probably a cartridge faucet.
If it has a rounded top and feels like it rolls, you’re looking at a ball faucet. Finally, if it has a sleek design and offers precise temperature control, it’s likely a ceramic disc faucet.
Identifying the type will help you troubleshoot and fix that pesky leak. Faucet repair services are available to support you, ensuring your home feels comfortable and inviting again.
When you know what you’re working with, you’re one step closer to making it right!
Turn Off the Water Supply
Before you start fixing that leaky faucet, you need to turn off the water supply to avoid any mess.
First, locate the shut-off valve, which is usually under the sink.
Once you’ve turned it off, double-check to make sure the water is really off before you proceed. This step is crucial as it helps prevent potential issues like emergency repairs that could arise from unexpected water flow.
Locate the Shut-Off Valve
Start by locating the shut-off valve to turn off the water supply. This valve is usually found under your sink, where the water lines connect to the faucet.
If you’re not seeing it there, check your basement or crawl space for a main valve. Knowing where this valve is can save you from a watery mess later, so take a moment to familiarize yourself with it.
Once you find it, give it a gentle turn to the right, and you’ll be set for the next steps.
Turn Off Water Supply
Now that you’ve located the shut-off valve, it’s time to turn off the water supply. This step is essential to prevent any mess while you tackle that leaky faucet.
Simply twist the valve clockwise until it stops. You’ll feel a sense of accomplishment knowing you’ve taken control of the situation. If you’re unsure whether the water’s off, turn on the faucet to check for any dripping.
It’s all about making sure your home stays dry and comfortable. Remember, you’re not alone in this; many of your neighbors have tackled similar issues and come out on the other side.
With every small fix, you’re creating a safer, more welcoming space for yourself and your loved ones.
Verify Water Is Off
How can you be certain the water is completely off? Start by turning off the main water supply to your home. This is usually located near your water meter.
Once you’ve done that, it’s time to verify. Head back to your faucet and turn it on. If no water flows, you’re in the clear! But if it still drips, you may need to check for additional shut-off valves under the sink.
It’s essential to confirm the water is off completely before diving into repairs. This simple step not only prevents any mess but likewise shows you care about your home and your family.
At Practical Plumbing Service, we’re here to support you every step of the way!
Plug the Drain
Before you start fixing that leaky faucet, make certain to plug the drain.
Using a sink stopper will prevent any small parts from disappearing down the drain and help you avoid additional headaches. It’s a simple step that guarantees you won’t lose anything important while you work. Additionally, addressing hidden leaks early can prevent more extensive damage later on.
Use a Sink Stopper
A sink stopper serves as an essential tool when tackling a leaky faucet. By plugging the drain, you prevent any small parts from accidentally slipping away while you work.
It’s easy to overlook this step, but taking a moment to secure the drain can save you a lot of hassle later on. Simply place the stopper in the sink before you begin disassembling your faucet.
This way, you’ll have peace of mind knowing that nothing’s going down the drain. Plus, it keeps your workspace clean, allowing you to focus on fixing that pesky leak.
Prevent Water Loss
Once you’ve secured the drain with a sink stopper, it’s time to focus on preventing any water loss during your faucet repair.
You don’t want to deal with a mess while fixing that leaky faucet! Start by turning off the water supply to the faucet. This simple step guarantees that no water flows while you work, saving you from potential flooding.
Keep a towel or small bucket nearby to catch any residual drips, making cleanup easier. If you’re unsure about any part of the process, don’t hesitate to reach out to your neighbors or local plumbing experts.
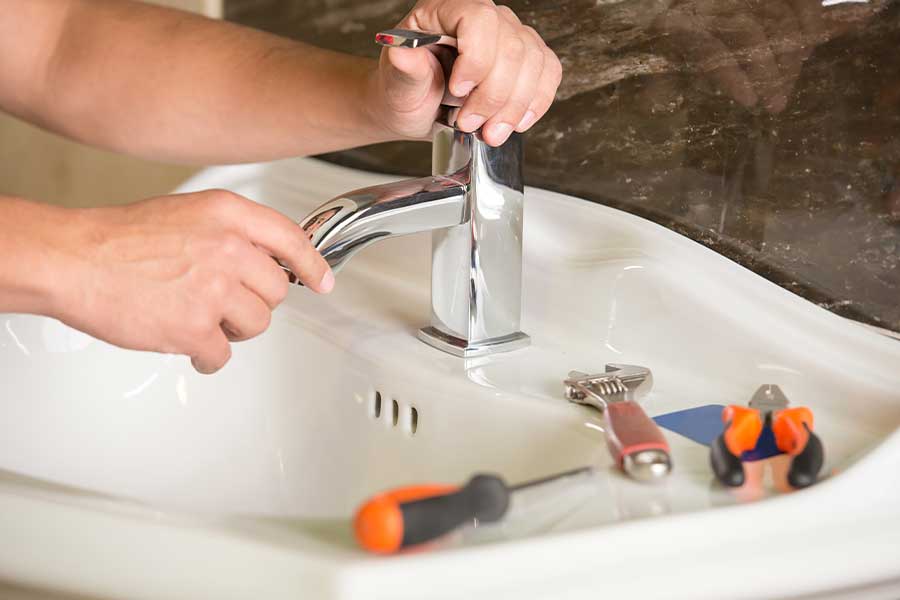
Remove the Faucet Handle
To remove the faucet handle, you’ll typically need just a few tools: a screwdriver and possibly an Allen wrench.
Start by turning off the water supply to prevent any spills. Next, look for screws that secure the handle; they might be hidden under decorative caps. If you spot them, gently pry off the cap with a flathead screwdriver.
Once you’ve located the screws, use your screwdriver or Allen wrench to loosen them. Be cautious as you pull the handle up; it might require a little wiggling if it’s stuck.
If it doesn’t budge, applying a bit of penetrating oil can help. Remember, you’re not alone in this; many in our community have tackled this task successfully. Additionally, if you encounter stubborn clogs during your repairs, consider reaching out to trusted rooter services for expert assistance in Greensboro, NC.
Once the handle’s off, you’ll be ready to address the leak. Don’t hesitate to reach out for help if you need it—your neighbors at Practical Plumbing Service are just a call away!
Inspect and Replace Washers
Inspecting and replacing washers is often the key step in fixing a leaky faucet. Once you’ve removed the faucet handle, you can easily access the washer. It’s usually located at the bottom of the faucet assembly, and over time, it can wear out, leading to leaks.
Take a close look at the washer for any signs of damage or wear, like cracks or fraying. If you notice any issues, it’s time to replace it.
When you head to your local hardware store, bring the old washer with you to find an exact match. Installing the new washer is a simple process; just slide it into place, reassemble your faucet, and turn the water back on.
You’ll be amazed at how a small part can make such a big difference! By tackling this task, you’re not just fixing a leak; you’re also taking pride in your home.
Check the O-Ring
One crucial step in fixing a leaky faucet is checking the O-ring, a small but indispensable component. This rubber or silicone ring is often found around the faucet handle and helps create a watertight seal.
Over time, it can wear out or become damaged, leading to leaks. To check the O-ring, you’ll need to turn off the water supply and disassemble the faucet. Carefully inspect the O-ring for cracks, tears, or signs of wear.
If it looks worn, replacing it’s a straightforward and inexpensive fix. Just make sure to bring the old O-ring to the store to find an exact match.
By addressing this small detail, you’ll not only stop the leak but likewise feel a sense of accomplishment. Remember, taking care of your home is about those little victories that make a big difference in your daily life.
You’ve got this!
Clean the Valve Seat
Cleaning the valve seat is an essential step in maintaining your faucet and preventing leaks.
You’ll need some basic tools to get started, and I’ll walk you through the cleaning process step-by-step.
Importance of Valve Maintenance
While it might seem like a small detail, regularly maintaining your faucet’s valve seat can prevent larger plumbing issues down the line.
By keeping the valve seat clean, you’re ensuring a proper seal, which helps avoid leaks that could escalate into costly repairs. It’s a simple task that encourages a sense of ownership in your home, showing you care about its upkeep.
Plus, a well-maintained valve seat improves your faucet’s performance, making your daily routines smoother.
In a community like ours, where we look out for each other, taking these small steps can make a big difference.
Tools Required for Cleaning
Maintaining your faucet’s valve seat is a straightforward way to prevent leaks, but to do it effectively, you’ll need the right tools.
Start with a wrench to loosen the faucet handle and a screwdriver for any screws you encounter. A small wire brush will help you clean away any debris or buildup, ensuring a smooth surface.
Don’t forget a cloth to wipe everything down afterward and a flashlight to spot hard-to-see areas in your plumbing. If you have some vinegar on hand, it can work wonders for tough stains.
With these tools, you’ll be well-equipped to tackle the job and keep your faucet in great shape.
Step-by-Step Cleaning Process
To guarantee your faucet operates smoothly, start by turning off the water supply; this step prevents any unexpected spills during the cleaning process.
Next, remove the handle and take out the cartridge or ball assembly. You’ll find the valve seat, which can accumulate mineral deposits.
Gently clean it using a soft cloth or a fine-grit sandpaper, being careful not to scratch the surface. Rinse the area with water to remove debris.
Once it’s clean, reassemble the faucet and turn the water supply back on. Test for leaks.
This simple cleaning step can make a big difference in your faucet’s performance. Remember, you’re not just fixing a faucet; you’re maintaining a comfortable home for you and your family.
Reassemble the Faucet
Reassembling your faucet is a straightforward process that can save you time and money. Start by taking the cleaned parts and laying them out in the order you removed them. This’ll help you remember how everything fits together.
Begin with the cartridge or valve, placing it back into the faucet body. Confirm it’s aligned correctly; you wouldn’t want any leaks after your hard work!
Next, reattach the retaining clips or screws, being careful not to over-tighten them. If your faucet has a handle, slide it back on and secure it with the set screw.
Finally, replace any decorative caps or covers.
Take a moment to double-check that everything’s snug and in place. Once you’ve done that, you’re almost ready to turn the water back on! Knowing you’ve successfully reassembled your faucet can bring a sense of accomplishment and pride in taking care of your home.
Turn the Water Supply Back On
Once you’ve reassembled your faucet, it’s time to turn the water supply back on. Head to the shut-off valve beneath your sink. Make sure you have a firm grip and slowly turn the valve counterclockwise. You’ll feel the resistance give way, signaling that the water is flowing again.
It’s a simple step, but it sets the stage for the next part of your plumbing project. As the water begins to flow, you might feel a sense of accomplishment—it’s a small victory that makes you part of a community of DIY enthusiasts. Remember, you’re not alone; many of your neighbors have tackled similar challenges.
Once the water’s on, keep an eye on any connections you’ve worked on. Taking this moment to check your work is important. You’ve done great so far, and you’re one step closer to a fully functioning faucet!
Test for Leaks
How can you guarantee your faucet is leak-free after all that hard work? It’s time to put it to the test!
First, turn on the faucet and let it run for a few minutes. Keep an eye out for any drips or moisture around the base or underneath. If you notice water pooling, you might have a lingering issue.
Next, turn off the faucet and listen closely. A slow, persistent drip can indicate a problem you didn’t catch initially. Use a paper towel to wipe down the area, then check for any new droplets forming.
Don’t forget to check the connections under the sink as well. If you feel uncertain or see signs of leaks, it’s always best to reach out to your neighbors at Practical Plumbing Service.
We’re here to help keep your home safe and sound!
Conclusion
By following these 10 easy fixes, you can tackle that leaky faucet in High Point, NC, without spending a fortune. Remember, a little DIY goes a long way—after all, it’s better to nip the problem in the bud than to let it spiral out of control. With just a few tools and a bit of patience, you’ll have your faucet working like new in no time. So roll up your sleeves and get started; you’ve got this!